")


VacuAptaca® test tubes are manufactured in PET with cap and label of specific colour as per the additive content, in accordance to ISO 6710. Inside the cap there is an easily pierceable pharmaceutical rubber. Materials used for the production are latex-free, heavy metal free and phthalates and sulphates free. The tubes are inside sterile with a SAL (Sterility Assurance Level) of 10-6 in accordance to UNI EN ISO 11137, UNI EN ISO 11737 Rules. The tubes are classified as in Vitro Diagnostic Medical Devices according to Directive 98/79/CE and subsequent modifications and additions. Collection needles are classified as Medical Devices according to Directives 93/42/CE, 2007/47/EC and subsequent modifications and additions.
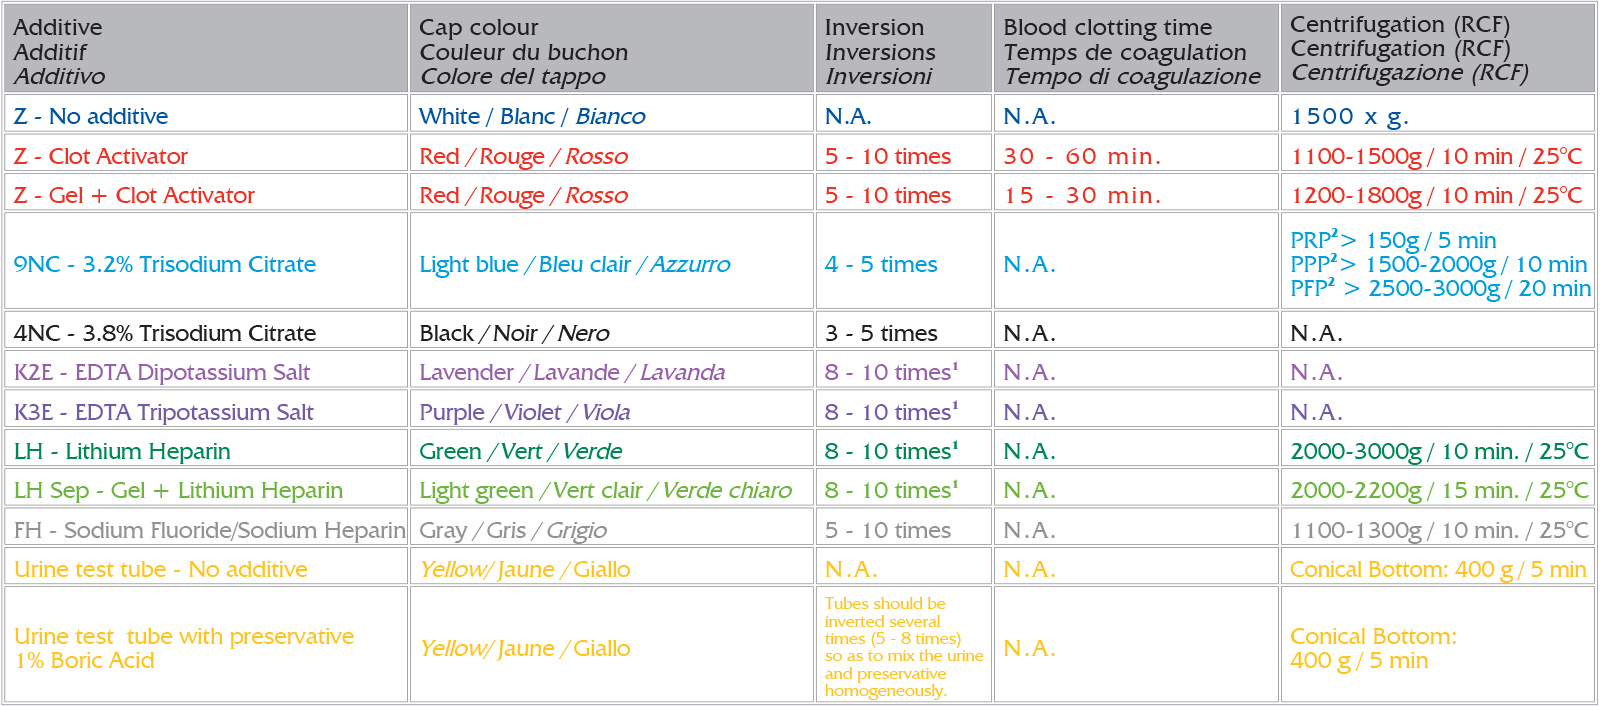
1 When the outside temperature is higher than 35°C, the inverting time should be increased accordingly
2 PRP (Platelet Rich Plasma) - PPP (Platelet Poor Plasma) - PFP (Platelet Free Plasma)
Keep all the tubes to a temperature between +4 °C / +30 °C. Storage outside the up mentioned temperatures can cause a loss of efficiency of the tubes and therefore modify the results of the analysis test. Do not use the product beyond the expiration date.
most blood collection tubes contain chemical additives. It is of most importance to prevent a possible backflow from the tube in the veins, which could have negative effects on the patient. You should take the following precautionary measures:
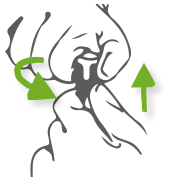
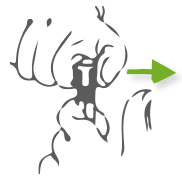
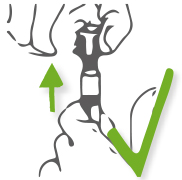
1. patient arm must be oblique lying and face-down.
2. hold the tube so that the cap is facing upwards.
In the case of bilirubin, erythrocyte protoporphyrin and carotene, samples must be transported under appropriate conditions in order to avoid exposure to sunlight.
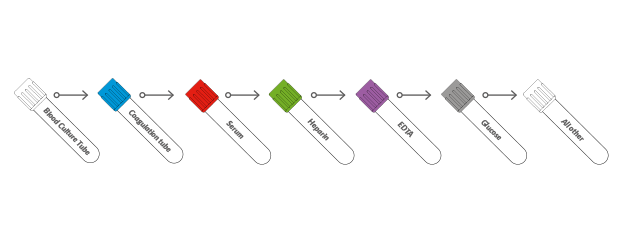
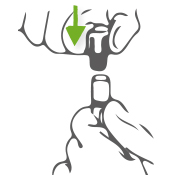
When the first test tube is full and the blood flow stops, gently remove it from the holder and introduce the next according to the following recommended sequence.
 Depending on the type of additive contained in the test tubes, all tubes must be gently reversed (without stirring, mixing vigorously can create foam or hemolysis) in order to get the right mix between blood and additive. The tubes containing EDTA and Heparin must be mixed in order to ensure that the sample does not coagulate. The tubes with the Clot Activator must be mixed otherwise the sample might not coagulate in stated time.
In order to ensure unambiguous identification of the sample, you must use a labelling system with barcode or restore the data into the appropriate fields of the label.
Depending on the type of additive contained in the test tubes, all tubes must be gently reversed (without stirring, mixing vigorously can create foam or hemolysis) in order to get the right mix between blood and additive. The tubes containing EDTA and Heparin must be mixed in order to ensure that the sample does not coagulate. The tubes with the Clot Activator must be mixed otherwise the sample might not coagulate in stated time.
In order to ensure unambiguous identification of the sample, you must use a labelling system with barcode or restore the data into the appropriate fields of the label. After collecting the last tube, remove the needle from the vein and dispose all devices (Holder, Luer adapter, multi-sample needle, butterfly needle, etc.) in special containers in accordance with the present regulations. No re-hooding needles, there is the risk of injury by puncturing and relative danger of infection. All sampling devices must be considered potentially infected after use.
Make sure that the tubes are correctly inserted in the appropriate support for centrifugation. The serum tubes must be centrifuged after a period of time approximately of 30 minutes from the collection in order to avoid subsequent coagulations (fibrin formation) in the serum. This can cause false analysis results. With the centrifugation by swinging rotor you get a gel barrier slightly thicker and more stable. Centrifugation should be carried in a refrigerated centrifuge. High temperatures may have adverse effects on physical characteristics of gel.
 How to open?
Step 1: Double arms holding. One hand pinches the bottom of the cap, and tweak it, the other hand pushes the cap upwards the same time.
|
 Step 2: Move the thumb before pull the cap out
|
 Step 3: Pull the cap upwards gently.
|
 |
 How to close?
Step 1: Make the cap right above the tube.
|
 Step 2: Tweak and meanwhile press the cap to the tube.
|
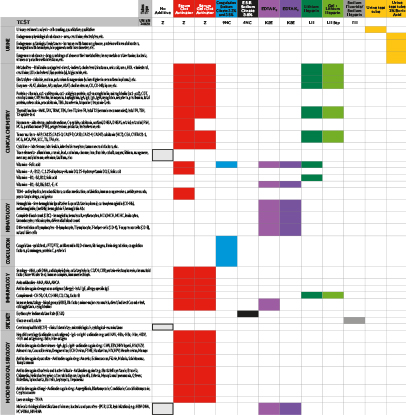 Click on the image to view/download the CHARACTERISTICS TABLE in PDF format.
Take note: the maximum tolerance of the vacuum is ±10%. The blood quantity taken with vacuum tubes can vary with altitude, temperature, atmospheric pressure, the test tube production date, the pressure and venous sampling technique.
The information contained in these tables are summary recommendations of the manufacturer. The user is obliged to verify the correctness of the data and the suitability of the tubes for the test that intends to carry out. Nuova Aptaca Srl is not responsible for any errors and/or omissions.